The chill is leaving the air, the temperatures are warming, it’s Spring! For many folks around the Valley that means it’s time to break out their checklists, mops, buckets and rags and to do a bit of Spring Cleaning. This month on the ACE Home Services blog, we want to talk about how you can add a few steps to your Spring Cleaning routine and take care of way more than clean floors. While you are at it, take a look at your water heater!
Aside from age, the number one problem water heaters’ face is the buildup of sediment in the tank. You might hear a sizzling or crackling noise from the unit as the heating element struggles to heat the water. All that sediment sitting in the tank is making your water heater fail, causing the heating element to work harder, wasting energy. This will, if left unchecked, 100% cause your water heater to be replaced early.
This doesn’t have to happen to you!
Save yourself the headache (and money) and put your water heater on your spring cleaning list!
Spring Cleaning Your Water Heater
You can add years to the life of your water heater by regularly draining the tank and flushing out the sediment at least once a year! It’s simple.
Address the Power
First, you need to be sure that the water heater isn’t running! For an electric unit you want to have the power turned off. Head to the breaker box and switch that off as well, better safe than sorry!
If you have a gas water heater you need to access the pilot controls and turn that off. Go to the gas line leading to your pilot light and turn that valve off as well.
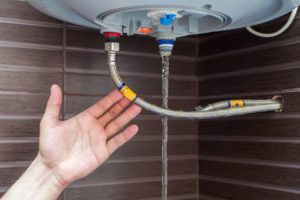
Open Some Valves
With the electric or gas turned off, it’s time to turn our attention to the water! Find the cold water inlet valve, usually on the top of the water heater. Turn that off, we don’t want any more water coming into the tank.
Your water heater will be full of hot water right now, so to help mitigate some of that heat, turn on a nearby hot water faucet. Let it run while you’re doing the entire flushing process, it’ll help keep a vacuum from forming in the lines.
Find the pressure relief valve on your water heater. Place a bucket under the drainage pipe and open it up. Watch out, this water will still be hot! If nothing comes out, your pressure relief valve is faulty and needs replacement. Good thing we found it now and not after a catastrophic loss! After you’ve opened the valve wait a bit to let the water in the tank cool.
This isn’t a totally necessary step, but opening the valve will help the flow of water. It’s also a good idea to test your pressure relief valve regularly anyways, opening and closing it to keep it from seizing. This just takes care of two things at once – and isn’t that nice?
Drain
Attach a hose to the outlet spigot on the bottom of your water heater. Once your house is attached and leading to a drain, bucket, or outdoors, open up the spigot and let it all drain. You’ll likely see the water coming out will have a brown coloration at first, this is the sediment sitting in the tank. Run it til it goes clear. You may have to drain the entire tank to get all the sediment out so be careful and keep a watchful eye, you don’t want to end up with a flooded floor!
Flush
To flush the tank, go back to the cold water inlet valve and open it up, allowing the water to flow into and through the tank, and out the spigot, taking any sediment along with it.
Once you’re satisfied with the clarity of your water, it’s time to put things back to the way they were.
Putting it All Back
Now you will go back through everything in reverse order to get your water heater back up and running.
- Turn off the drain spigot, disconnect the hose
- Close the pressure relief valve (if opened)
- Turn off the nearby faucet
- Turn on the cold water inlet
- When the tank is full again, open the pressure relief valve to relieve any excess air
- Turn on the hot water faucet of a sink or tub to let any air out of the system (note: this water should be cold at this point. Turn it off)
For Gas Water Heaters
- If your unit is shut the gas off, now’s the time to turn that back on.
- If you turned the thermostat off, relight the pilot light and turn the thermostat back on.
For Electric Water Heaters
- Flip the breaks back to on
- Now confirm your thermostat is set to the right temperature (around 120° to prevent scaling)
Wait for about 20 minutes to a half hour for your water to heat back up. Try the hot water somewhere in your home and make sure that hot water is coming out.
And just like that, you’ve flushed your hot water heater! Not too bad huh? In doing so you also checked and operated the various inlet, pressure relief, and drainage valves and made sure everything is working like it should, performing good maintenance to keep your water heater working for years to come. Now, put flushing your water heater onto your calendar for next year and keep it up!
While you are in there, think about cleaning up the space your water heater sits in, any dust or debris that may have accumulated should be cleared away, remove the various hoses and buckets you may have brought down and dry up any spills. If during the process you found any parts aren’t working like they should or are a bit intimidated by the prospect of flushing your own water heater – no worries! Give us a call at ACE Home Service, we’re happy to help! Whether that’s performing water heater inspections and maintenance or repairing faulty parts we do it all!